
Natural Product Making; BFEI Night class Notes
I have put together this page so you have easy access to some information that you might find useful ..........

Course Content (subject to change):
1, 7th Oct, 6.30pm; Introduction & Bath Bombs
2, 14th Oct, 6.30pm; Soy Candle & Wax Melts
3, 21st Oct, 6.30pm; Natural Deodorant & Exfoliating body scrub
mid term break (college is closed)
4, 11th Nov, 6.30pm; Hydrating Facial Spritz/Facial Toner & Moisturising Balm
5, 18th Nov, 6.30pm; Cold Pressed Soap Making
6, 25th Nov; 6.30pm; Lip Balm, Facial oil & Clay Facial Mask/Cleanser
Website's I mentioned:
bomar.ie for most ingredients
-------------------------------------------------------------------------
First Class Notes:
| Recipe for bath bombs: | 
|
Bath bombs are fun to make and to use: pop them in a warm bath and as they hit water they fizz and release all their loveliness.
What you will need:
250g Bicarbonate Soda
110g Citric Acid
2ml Essential oils/fragrance
2 x Bath Bomb Mould
10 – 20ml Vegetable oil/coconut oil or cocoa butter
Flower petals/embellishments for decoration
Extra equipment needed:
• A mixing bowl (to mix all the ingredients together)
• Rubber gloves if your hands are very sensitive (optional)
• A tray or somewhere flat to put the bath bombs while they set
Method:
1. Combine the bicarbonate soda & citric acid in a bowl and mix well - you can use your hands.
2. Add the oil/cocoa butter (if it’s cocoa butter you are using you will need to heat it first) to the dry ingredients and mix thoroughly.
3. At this point you will need to spray a little water on the mix, not too much or it will start fizzing just 2 or 3 squirts.
4. Continue to mix. You will know it is ready when you can take a handful of the mix, squeeze it in your hand and it holds it shape (Like slightly damp sand).
5. Take your bath bomb mould and place some petals/embellishments in the bottom for decoration.
6. Heap the bath bomb mixture on top of the decorations in the mould and press down firmly, then tip upside on a tray and tap it out- like a sandcastle! At this point the bath bomb is really delicate so place somewhere safe and dry to set.
7. Leave for 24 hours or until it becomes hard.
8. If you find the mixture is not holding together add a little more water or a little more oil.
I’d love to see your creations, please tag me on social
Instagram: create_with_MuMe Facebook: Create with MuMe
----------------------------------------------------------------------------
Second class notes:
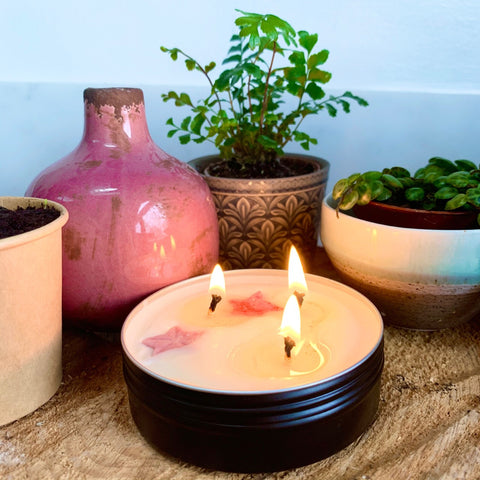
Soy candle making
Soy wax is a lovely wax to use for candles as it has a good 'scent throw' and it doesn't melt too quickly but there are other nice waxes you may want to try including rapeseed and coconut or beeswax.
Soy candles can be made in a variety of containers including glass (heatproof), ceramic, aluminium or tin. They are great fun to make and make fabulous gifts - here's how ....
Soy Wax Candle & MeltsWhat you need:
|
 |
Extra equipment needed:
- Heatproof jug (for melting the wax)
- Something for stirring the wax
- Saucepan
Method:
- Place Soy wax into the heatproof plastic jug and heat in a double boiler (place in a saucepan with an inch or so of water) on a medium heat so the water doesn’t boil over.
- Dip wicks into melted wax and then ‘stick’ to the bottom of the candle container- place each wick on one of the marked areas.
- Remove the jug from the water and leave the wax to cool slightly.
- Add Fragrance to the Soy wax and stir.
- When it turns slightly opaque pour the wax into the candle container. Don’t fill right up to the top, leave a little space (approx. 1cm), to allow for the embellishments.
- After the wax cools and turns slightly white add embellishments
- With the wax that is left you can pour onto the waxed paper mat and decorate with flower petals, to make beautiful rustic wax melts for a burner.
WARNING! To prevent fire: keep burning candle within sight. Keep out of reach of children and pets. Never burn a candle on or near anything that can catch fire. Trim wick to 5mm each time before lighting. Candle must be placed on a heat resistant surface. Extinguish when wax gets within 15mm of bottom.
websites I mentioned: the sage.com (fragrance calculator) supplyforcandles.co.uk INcandlesupplies.co.uk bomar.ie
------------------------------------
Third class notes:
Body Exfoliating Scrub
The great thing about these body exfoliating scrubs is that they can be made from ingredients you have at home, you can change the base to suit your needs and add herbs from the garden for a range of benefits.
Ingredients:
70g Sugar or salt
30g Vegetable oil such as sweet almond oil, olive or coconut oil
6 - 7 drops of essential oils/fragrance
Method
- Full your container with the sugar or salt; choose a grain that suits the type of exfoliation you require i.e. the smaller the grain the smoother the exfoliation will be.
- If you are using essential oils add them to your base oil and stir.
- Pour the oil mix onto the sugar/salt until you reach the desired texture.
- Add any dried herbs and stir.
To use place a small amount of the scrub on your hands, during a shower or bath, and massage in a circular motion – avoid delicate areas such as the face and chest. Rinse off.
Natural Deodorant
INGREDIENTS:
35g coconut oil (the active ingredient that controls odour),
5g shea butter (optional – adds a moisturising element),
55g cornflour/arrowroot starch (helps to keep your skin drier),
10-15g baking soda (helps to keep your skin drier),
10 - 15 drops lemongrass/tea tree/lavender essential oil (optional)
INSTRUCTIONS:
1, Melt your coconut oil in a double boiler system (heatproof jug in a pan of water).
2, Add the coconut oil, baking soda and cornflour/arrowroot to a small container and stir to combine.
3, To apply, take a small amount with your finger and rub it well in your underarm area.
Store in a cool, dark place like your medicine cabinet. This amount should last you about 1 to 2 months.
Fourth class notes:
Body Moisturising Balm
Body moisturising balms and a lovely treat for your body; the possible recipes are endless but I’ve made this one very simple using the best ingredients, feel free to change the vegetable oil or the butter – its great to experiment with different ones to see what works best for you.
Ingredients:
45g Shea Butter
20g Coconut Oil
70g Vegetable Oil
10g Beeswax
20 drops of essential oils if desired
Method
1. Melt all base ingredients (everything apart from the essential oils) in a heatproof container in a double boiler, on a medium heat, until it is completely melted.
2. Leave to cool for a little while, until it begins to go opaque, then add your essential oils and stir
3. Pour into your container and leave to completely cool before placing the lid on.
To use: simply warm a little in your hands and use to moisturise.
Hydrating facial spritz
Facial sprays are really easy to make and it’s nice to know exactly what is in it. You can use this one as a toner with a cotton wool pad or as a hydrating spritz throughout the day.
Ingredients:
30ml witch hazel water
50ml lavender water (you could also use orange blossom or rose water)
If you have particularly oily or decongested skin you can add 5ml of apple cider vinegar
Essential oils are optional; if you would like to add some use around 8 drops
Method
Simply mix all the ingredients together and add essential oils - easy :-) Shake before use and either spray directly on the face or on to a cotton pad first.
------------------------------------
Fifth class notes:
Cold Pressed Soap Making
------------------------------------
Sixth class notes:
Lip Balm, Facial oil & Clay Facial Mask/Cleanser